Prezi is an alternative to PowerPoint. You can use it to make presentations that include text, images and youtube videos. All your Prezis are stored on the Prezi server, and can be viewed by the general public.
Watch this video tutorial on how to get started (if you want to make the video bigger, you can make it take up your full screen by clicking on the bottom right corner, where you see four arrows pointing outward; to escape from full screen mode, hit the escape key on your keyboard)
If you prefer, you can scroll down the Prezi getting started page to see written instructions rather than watch the video. There are also additional videos on how to use Prezi at http://prezi.com/learn/.
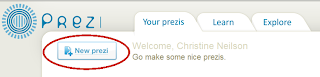
Make sure you're logged in to Prezi
Click on the “New Prezi” button at the top left of the page
Make a short presentation about music. Make sure that you have each of the following:
A title for your presentation
Three separate bits of text. Make sure one of them is at an angle.
An image of some kind. Clip art will be fine.
A youtube video (you insert a video by pasting the url for the video in a text box). If you can’t decide on a video, you can use this one: http://www.youtube.com/watch?v=tgbNymZ7vqY
View your Prezi show.
Optional:
If you don’t like Prezi but you like the idea of posting your presentation slides on the internet, check out slideshare. Slideshare allows you to upload and share slides made in PowerPoint or Google Docs, and other people can post comments about your presentation. Now blog!
Blog about your experience using Prezi. Do you see yourself using this program in the future? Tell us what you particularly liked – and didn’t like - about it. Optionial: post a link to your prezi on your blog so others participating in the University Library 23 Things program can see it
Important Note for Next Week: Next week we'll be discussing YouTube and Podcasts. It could get a little noisy so, if you have them, please be sure to bring headphones so you won't disturb your co-workers.
Create a form that's attached to a Google spreadsheet
Update your blog with your thoughts on Google Docs
Google Docs allows you to create documents, spreadsheets, slideshow presentations, and data entry forms connected to a spreadsheet. The files are stored online so you, and other people with Google accounts that you grant permissions to, can access these files from any computer with internet access.
Watch this short introduction to Google docs to get an idea of what you’ll see when you get to Google docs.
If you want more detailed information on how to use Google Docs, Spreadsheets, and Presentations, see the collection of videos “Google Apps: Docs Essential Training” on Lynda.com. Lynda.com is available to all U of S staff via dedicated computer terminals in the Murray library.
To get started in Google Docs:
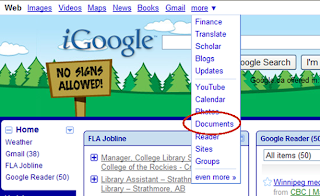
Log in to your iGoogle page
Click on “more” in the list of options at the top of the page, and choose “Documents” from the list
Documents
Click on the Create New button, and select Document. When your new document pops up, there will be a toolbar at the top that’s similar to the tool bar in Word, and a large blank area underneath that.
Type something in the blank area. Play around with the fonts and other items on the toolbar so that you can see the features it offers.
When you are done, click the Save button in the upper right-hand corner of the page. Then click on the Share button. You will be presented with several options, including the ability to send the page as an email attachment or publish it as a web page. When you share your document with other people, you can set them up as collaborators (co-editors) or viewers. You do so by sending them an invitation to the document via email. Go ahead and send yourself an invitation as a collaborator, using your U of S e-mail address. You will be able to attach a message to the invitation
Now click on the File button. You have several options there, including the ability to rename the document, see the history of revisions, and save the document as a web page. Select “Download file as” and look at the different file formats you can use.
Spreadsheets
The Google Spreadsheets program is similar to Excel.
One feature of Google spreadsheets is the ability to create a form that automatically populates a spreadsheet as people submit information.
Click on the Create New button, and select Form from the list.
The page that comes up allows you to create your form. Give your form a title and, if you like, a short description. Add questions to the form by clicking on the "Add item" button at the top left of the form and selecting the type of question you'd like (for example, multiple choice or typing in text). If you like, you can also change the background by clicking on the "Theme" button and choosing from the options provided.
Here is an example of a short form made using Google forms/spreadsheets. You can fill it out if you like; Any answers submitted will be entered directly into a Google spreadsheet.
Add your name to the list of participants by clicking on an available cell and typing in your name.
Mark off the weeks that you’ve already completed (including this one!).
Save the spreadsheet by clicking on File > Save
From now on, once you have completed the assignment for a week, go to the spreadsheet and mark what you’ve completed. To find yourself in the list of participants easier, use the Find function by going to the Edit menu; clicking on “Find and Replace”; typing your name in the “Find” box- leave the replace box empty! – and clicking on the find button below.
Now blog! Tell us what you thought about Google Docs, and whether you think it has potential as an office tool.
Welcome to Week 3, Things 4 & 5 – RSS Feeds and Google Reader
After completing Things 4 & 5 you will have…
Learned what RSS feeds are, created a Google Reader account, added a few feeds to your reader (including the University Library 23 things blog RSS feed), explored other RSS feeds and You will also have added the University Library 23 things blog RSS feed to your iGoogle page.
What is an RSS feed & Google Reader?
RSS stands for “Really Simple Syndication” and it allows you to view new content from websites, newsfeeds, blog entries, etc. in one place without having to visit the individual sites. When you are looking for websites, newsfeeds or blogs to subscribe to an RSS feed, you will often see an orange symbol to indicate a feed (at top of page). Once you’ve located a feed, you need to subscribe to that feed using a “reader”. The reader we will be using today is “Google Reader”. Now instead of having to go out to various websites, newsfeeds, journal providers & blogs everyday to see the new content, you just have to go to one place- Google Reader.
Watch these great videos from Commoncraft.com that explains RSS feeds and Google Reader.
(using RSS feeds)
(using Google Reader)
Now that you’ve seen how it works- let’s try setting up a Google Reader account and adding the University Library 23 things blog RSS feed.
Step-by-step instructions
NOTE: These instructions are for Internet Explorer. If you are using FireFox or Safari, there will be other options.
1. Go to Google Reader http://reader.google.com/
2. Sign into Google Reader using your Google Account (same account you created for your iGoogle account)
3. Open a new window and leave Google Reader open
4. Go to the University Library 23 things blog http://uofslibrary23things.blogspot.com/
5. Look for the orange RSS feed symbol on the right hand side of the page under “subscribe to this blog"section.
6. Click on “Posts” and from the drop down menu, select "Add to Google."
7. A new window will open and there will be two options. Select the option "Add to Google Reader" on the right hand side of the page.
8. Google Reader should automatically open up and subscribe you to this feed. The feeds you subscribe to, will appear in the menu on the bottom left hand side of the page under "Subscriptions."
9. Now that everyone is subscribed to the University Library 23 things blog RSS feed, let’s try adding one more feed. Leave your Google Reader open and go to http://www.cbc.ca/rss/
1o. Select the RSS feed you’d like to subscribe to. For example select 'Top Stories' (under the "General News" section).
11. Click on the orange RSS symbol or link for the feed you would like to subscribe to. Copy the URL from the top of your browser (http://rss.cbc.ca/lineup/topstories.xml) and go back to your Google Reader.
12. Click on the red “Subscribe” button.
13. Paste the URL into the box and select the "Add" button.
14. You are now subscribed to this feed. You will notice the feed under the "Subscriptions" section on the bottom left hand side of the page.
15. You can now sign out of Google Reader.
Now to add the University Library 23 things blog RSS feed to your iGoogle page
3. Look for the orange RSS feed symbol on the right hand side of the page under "subscribe to this blog" section.
4. Click on “Posts” and from the drop down menu, select "Add to Google."
5. A new window will open and there will be two options. Select the option "Add to Google Homepage" on the left hand side of the page.
6. Your iGoogle should open and the feed should now have been added to your page.
7. Blog about your experience using RSS feeds. Do you think this is valuable? Will you use RSS feeds? Is this useful to know working in a library? Optional: Try this!!!
1. Instead of having to go to your favourite websites everyday, see if they have RSS feeds. If they do, add them to your Google Reader. Now you will only have to visit Google Reader instead of a lot of different websites. Think of the time you will save! If you are having trouble finding an RSS feed to add to your Google Reader, here is a link to a directory for RSS feeds. http://ca.feedzilla.com/ .
2. For those who are really keen.. try adding your own blog RSS feed to your iGoogle page. Go to your blog and sign in. Click on 'Layout' on the left sidebar. On the right hand side, click on 'Add a Gadget'. Scroll down to the gadget "Subscription Links" (you will see the RSS feed orange symbol). Click on the blue + sign and click on the orange save button. Now you will see "Subscribe to" as a gadget on your blog design layout. Click save. When you now view your blog, you will see the new gadget added on the right hand side with the RSS feed orange symbols (subscribe to/posts/comments). Now you can repeat steps 1-6 above, but use your blog instead of the University Library 23 things blog. Have fun!